Why Does Mobility Matter for Cycling Performance?

Cyclists and triathletes spend a lot of time on their bikes. And as a coach, I regularly get asked how athletes can get faster. Most athletes are happy to buy more aerodynamic components or gear. Many athletes are happy to work on building strength on the bike through sports specific strength work (e.g. riding hills or doing big gear low cadence rides) or weight lifting. And fewer athletes are interested/willing to do the unsexy mobility work that can have a direct impact on their performance. For 20+ years, Playtri has been helping Age Group athletes improve their performance through providing workouts and also through encouraging mobility work for all our athletes.

Mobility work is a low stress, high reward practice so as the off season approaches for many athletes, now is an excellent time to create a daily mobility habit. Your mobility work can include dynamic stretching, gentle yoga, foam rolling, stretching, and the like. But whatever you choose it needs to be repeatable (so you can do it again and again easily) and adaptable (to address any mobility issues that arise). Anecdotally, my athletes who are committed to mobility work on a regular basis tend to see the biggest progress year after year.

Here are four reasons why mobility work can be so impactful:

  1. Injury Prevention
    Cycling is a repetitive motion sport. Mobility work helps to reduce the risk of injury by preparing your body for the countless pedaling you will do. An increased range of motion in your joints, helps them to handle the stress of cycling, which can prevent aches and pains.

  2. Improved Performance
    When your joints have a great range of motion and strength through that range, you will be able to generate more power with each pedal stroke which allows you to go faster and farther during training and racing.

  3. Improved Comfort
    If you are in the saddle for long periods of time outdoors and/or on the trainer, mobility work increases your comfort by reducing the potential for aches and pains. This means reduced fatigue and improved efficiency.

  4. Improved running off the bike
    Many age group triathletes have restricted hip range of motion because of work habits (seated most of the day) and the amount of time we spend in the aero position on the bike with limited hip range of motion. When triathletes increase their hip range of motion through mobility work they can experience better glute activation and greater efficiency in both their pedal stroke and running stride. 

For mobility work, I strongly suggest purchasing a foam roller and a lacrosse ball. And if you want some hands on coaching to learn a repeatable and adaptable mobility routine, you can schedule a one-on-one session here. And if you have any questions about anything in this article or are interested in learning about different coaching options, please reach out to me at jim.rowe@playtri.com. Happy training and racing this year!

Jim Rowe is a Playtri Level 4 Coach and Coach Education Lead, a USAT LI Certified Coach, an NASM Certified Personal Trainer, and an Ironman and 70.3 World Championship Qualifier who works with adult athletes of all abilities from beginners to IRONMAN World Championship qualifiers. Learn more about Jim at www.playtri.com/jim-rowe

How to Increase Run Volume Without Getting Injured

Running faster is a goal for most triathletes and one of the ways that you can get faster is by running more. An excellent example of this is professional short course triathlete Richard Murray. During the pandemic, Murray increased his run volume but did not increase the speed at which he was running. He did the vast majority of his running at low intensities. Toward the end of the pandemic, after many weeks and months of high volume running, he ran his fastest 5k ever with little to no speed work.

For age group athletes increasing run volume can be difficult with the limits we have on our training time. Likewise, as we age we become more susceptible to lower leg injuries (achilles tendonitis, calf tears, foot injuries) that take a long time for full recovery. If you are looking to increase your run volume this off season, here are my top suggestions.

  1. Work with a coach.
    Working with a coach who has a proven track record of helping age group athletes improve their athletic fitness and reach their goals can help you increase your run volume safely and sustainably. Playtri has over 20 years of helping age group athletes improve and reach their goals.

  2. If you are a beginner, be cautious.
    Instead of increasing your mileage every week, increase your mileage every 2-3 weeks to allow your body to adapt.

  3. If you are a more experienced runner, find your sweet spot.
    For many advanced runners there is a mileage sweet spot that is specific to them as individuals. This is a volume range that is comfortable for them to repeat week after week, but if they move past this range they find themselves more prone to injury and fatigue. Consistency in this sweet spot is far more important than jumps in mileage.

  4. Don’t neglect strength and mobility work.
    More running volume means an increased chance of injury. As an age group athlete with time limits, make sure you do not cut down on your strength and mobility work. Use that foam roller daily, do dynamic stretching before and after your runs, stay committed to core strength including hip strengthening exercises, and use ice baths and Normatec boots if you have them. Playtri coaches are available to help you learn good strength and mobility routines. Click here to learn more.

  5. Increase load through swim and bike work.
    Your cardiovascular and muscular systems don’t know the difference between a swim, bike, or run. The difference is in the higher impact nature of the run. If you are looking to increase your run mileage, a good place to start is by doing brick workouts (swim-run or bike-run) that allow you to add load to your training while decreasing the impact of more run volume. As you adapt to the higher load, then you can more safely increase your run volume.

  6. Rotate your shoes and running surfaces.
    As your increase your run volume, it is beneficial to rotate the shoes you wear and the surfaces you run on. Different shoes and different run surfaces engage your body in different ways. Run trails, spend some time on tracks, but don’t do all your running on pavement.

If you have any questions about anything in this article or are interested in learning about different coaching options, please reach out to me at jim.rowe@playtri.com. Happy training and racing this year!

Jim Rowe is a Playtri Level 4 Coach and Coach Education Lead, a USAT LI Certified Coach, an NASM Certified Personal Trainer, and an Ironman and 70.3 World Championship Qualifier who works with adult athletes of all abilities from beginners to IRONMAN World Championship qualifiers. Learn more about Jim at www.playtri.com/jim-rowe


Freestyle Swimming Basics: EVF

In Part One of our Freestyle Basics series, we discussed the initial part of the stroke, referred to as “the catch”. The next part of the stroke, and something that many triathletes may not know a lot about, is the early vertical forearm. Early vertical forearm (or EVF) is an extension of the catch and will help ensure that you grab the most amount of water possible. It is also the beginning part of your pull phase of your stroke.


What is Early Vertical Forearm (EVF)?

Early vertical forearm is exactly what it sounds like… getting your forearm into a vertical position during the “catch” phase of your stroke as soon as possible. Triathletes and swimmers that are able to achieve a good EVF and maximize the amount of water you can grab will pull water more effectively and swim faster with less effort.

Initiating the Pull Phase

Many swimmers and triathletes tend to tend to allow their wrist to flex or their elbow to drop during the initial aspect of the pull phase, which leads to decreased efficiency in

the stroke (I always tell my athletes to “keep your elbows higher than your wrists throughout the pull phase”). Following the catch, you should already have your fingertips facing down, and you are aiming to get your forearm vertical as soon as possible. When you are swimming, you are not just pulling water with your hand, but with your entire forearm. The first 1/3 of the stroke should come from the elbow bending (think “keep the elbow high”). The Finish


Pull Through (Propulsion)

Once you have set up your catch and EVF, then you will pull through and finish your stroke. This part of the stroke is the most crucial, as this is where you develop the propulsion of your stroke. As you pull through, you want to keep your wrist and hand firm, keep your elbow high, and pull through while keeping your body streamlined. One of the most effective ways to develop a strong pull phase is to use swim paddles (TYR Catalyst Stroke Paddles) to build swim specific strength in your upper body. Another way to develop an effective pull is to utilize swim cords (Finis Dryland Cords) to work on the specifics of the stroke outside of the water.


If you are struggling with your swim stroke we offer one-on-one swim sessions and Remote Swim Stroke Analysis with Playtri Coach Michael Rourke, where I personally analyze your swim stroke via video and discuss ways you can further develop your swim stroke. Check out all our coaching options (Playtri Coaching) and reach out if you have any questions! Stay tuned for Part 3!


Coach Michael Rourke is a Level 3 Playtri Coach and an American Swim Coaches Association Level 4 swim coach. He coaches junior and adult triathletes of all levels, as well as high school elite swimmers. He is also a 70.3 World’s Qualifier and USAT Age Group Nationals Qualifier. Coach Michael is currently taking on new athletes, so if you are interested in Remote Swim Analysis or Individual Coaching Programs, send him an email to michael.rourke@playtri.com.

Set Up Your Training Device(s) for Optimal Use

Whatever training device(s) you use (Garmin, Wahoo, etc.), getting the most valuable in-workout data requires some initial setup.

First, make sure you have the correct sensors to correct the data you will want to have in training.

Recommended Additional Sensors:

  • Heart Rate Monitor (bike/run): Measures heart rate as beats per minute, or bpm. Always use a chest or forearm based HRM - not wrist. Use the same for bike and run.

  • Power Meter (bike): Measures power produced while pedaling as watts. Built into pedals, crank arm or wheel hub.

  • Cadence Sensor (bike): Measures cadence as revolutions per minute, or rpm. Most power meters have a cadence sensor built in, so you can likely forego this one if you have a power meter.

Second, we ask our athletes to set up their primary data fields on all their devices in the following configurations for runs and bikes to keep the focus on the most pertinent metrics for decision-making during the session.

Recommended Bike Data Fields (single screen):

  • Timer: This one is obvious, but make sure you can track overall workout length and length of intervals by using a timer field.

  • Heart Rate: Measured in beats per minute or bpm – best when measured with a chest strap heart rate monitor (needs to be paired as a sensor with your device). You should be keeping an eye on heart rate during the majority of your rides, whether it’s to observe and respect the additional load of heat/humidity, to catch illness and under-recovery before they become an issue, or to ensure proper recovery between intervals.

  • 3s Power: This stands for three second average power and is a way to view current power throughout the ride with slightly less volatility than the regular Power metric. If you don’t currently have a power meter you can replace this with speed, but recognize that speed is an extremely variable metric.

  • Cadence: How quickly your legs turn over, measured in revolutions per minute or rpm. Optimal cadence varies across athlete, but everyone should keep an eye on it to ensure they are in a range that is appropriate for their body and goals.

Recommended Run Data Fields (single screen)

  • Timer: Same as bike – track workout length and intervals with this field.

  • Heart Rate: Similar to bike – use heart rate to manage efforts, as well as recovery during interval sessions.

  • Pace or Power: If you don’t currently have power, it’s helpful to have pace as a field on your run to help manage interval efforts – if you have power, you can use that in lieu of pace.

  • Cadence: We recommend looking at run cadence the same way you look at bike cadence – the vast majority of runners should be aiming for a cadence of 175 or higher. Most devices now have a run cadence sensor built in.

Third, get your device connected to your TrainingPeaks account for autosync so you don’t have to manually add files to your workouts for analysis.

Finally, make sure you staying on top of device maintenance:

  • Calibrate your power meter every time you ride.

  • Replace sensor batteries if readings start to seem “off” – if this doesn’t fix it, call the manufacturer.

  • Check for software updates for devices and connected apps to ensure that all are being properly supported by the manufacturer.

Questions? Shoot us an email at headcoach@playtri.com!

Learn more about Playtri Coaching programs at www.playtri.com/coaching.

Freestyle Swimming Basics: The Catch

Swimming is the sport that intimidates many new triathletes, especially those that are late onset swimmers. The best way to develop the proper freestyle technique is to break it up into each specific part. This series is going to cover the various aspects of the freestyle stroke and how you can focus on one specific area of your stroke on your journey to successful swimming.

What is the Catch?

The catch is the first part of the stroke, and it determines how effective the pull phase of your stroke is. Many swim coaches will use the phase “grab water” when they are referring to the catch of the stroke; it sounds impossible to grab water, but the way that you set up your stroke will help you develop the most efficient stroke possible. You want to have a little bit of space between your fingers so that you can keep your fingers strong and increase surface area, without decreasing propulsion.

Initiating the Catch

As your arm enters the water, you want to “anchor” your arm by implementing a high elbow catch, as shown here. As you set up your catch, you want to bend your wrist, keep a strong hand, and point the fingertips down. This is creating your “anchor” and setting you up for a proper catch.

How to Improve your Catch

As you develop the “feel for the water” (another swim coaching term that you may have heard”, initiating the proper catch will become more comfortable. One way that you can develop your catch is to utilize a swim snorkel (Finis Swim Snorkel) and pull buoy (Finis Pull Buoy) so that you are focusing solely on the upper body and keeping your body in alignment. Another way that you can develop your catch is to use swim paddles (TYR Catalyst Swim Paddles) so that you create a greater surface area and a stronger feel for the water. Isolating the upper body and focusing on setting up your stroke while going slower will help you go faster in the long run; take your time and enjoy the process!


If you are struggling with your swim stroke, we have one-on-one swim sessions available here at Playtri, as well as Remote Swim Stroke Analysis, where we analyze your swim stroke via video and discuss ways you can further develop your swim stroke. Check out all our coaching options (Playtri Coaching) and reach out if you have any questions! Stay tuned for Part 2!


Coach Michael Rourke is a Level 3 Playtri Coach and an American Swim Coaches Association Level 4 swim coach. He coaches junior and adult triathletes of all levels, as well as high school elite swimmers. He is also a 70.3 World’s Qualifier and USAT Age Group Nationals Qualifier. Coach Michael is currently taking on new athletes, so if you are interested in Remote Swim Analysis or Individual Coaching Programs, send him an email to michael.rourke@playtri.com.

What is Sweat Rate Testing

Because endurance athletes tend to do most of their training outdoors, it is incredibly beneficial for your safety and performance to understand how much sodium you lose in your sweat and what your sweat rate is.

The best and simplest way to learn how much sodium you lose while sweating is to do an Advanced Sweat Test at Playtri. As sweaty as this test may sound, it is the easiest performance test for the athlete that we administer. The test takes approximately 45 minutes and you spend all that time sitting in a chair while the tester does all the work. The test results will show you the amount of sodium you lose in 32 oz of sweat and give you a personalized hydration plan with specific water and sodium intake recommendations. We highly recommend this test for all athletes pursuing health or performance, but especially for those pursuing long course or competitive short course goals. Knowing how much sodium you lose in 32 oz of sweat and knowing your sweat rate is very helpful in determining your hydration plan.

Determining your sweat rate, however, is a bit more involved and a bit more sweaty. While your sodium loss remains constant, your sweat rate will vary depending upon intensity, temperature, humidity, clothing choices, heat acclimation, etc.

Because of this variability, sweat rate testing should be done for all your key workouts and in various conditions throughout the year if you want the results to help you as much as possible on race day. And sweat rate testing is something that we ask all our gold and silver level individual coached athletes to do for their key workouts throughout the year. Here’s how we do sweat rate testing with our athletes.

Before your key workout: track your pre-workout nutrition and hydration and weigh yourself naked after one final trip to the bathroom. Also note the temperature and humidity at the beginning and end of your workout, which will help with your coach’s nutrition & hydration planning for your next race.

During your workout keep track of the amount of water and sodium you consume per hour. And the amount of carb calories your consume per hour. After your workout, towel yourself dry and then weigh yourself naked again. 

Once I have all this information from my athlete, I then use the following formula to determine their hourly sweat rate: 16 x [(Starting Weight lbs) – (Weight lbs after 1-hour exercise)] + [fluids consumed during oz] = sweat loss in ounces per hour.

During my years of coaching, I have seen a wide range of sweat rates amongst individual athletes ranging from 16 ounces per hour to well over 50 ounces per hour.  The goal during training and racing is not so much to replace all the sodium and water you lose through sweat, but to manage your dehydration in a sustainable way. While someone losing only 16 ounces of water per hour through sweat may be able to replace all that water, an athlete losing over 50 ounces per hour will not since most people cannot comfortable consume more than 32 ounces of water per hour. Remember: intensity, temperature, humidity, clothing choices, and heat acclimation directly impact your sweat rate.

If you have any questions about anything in this article or are interested in learning about different coaching options, please reach out to me at jim.rowe@playtri.com. Happy training and racing!

Jim Rowe is a Playtri Level 4 Coach and Coach Education Lead, a USAT LI Certified Coach, an NASM Certified Personal Trainer, and an Ironman and 70.3 World Championship Qualifier who works with adult athletes of all abilities from beginners to IRONMAN World Championship qualifiers. Learn more about Jim at www.playtri.com/jim-rowe.

Triathlon Race Day Hacks from Coach Jim

As in all sports, there are small things you can do to improve your performance on race day that take very little extra energy or focus. As a competitive age group triathlete for the past 18 years and as a Playtri coach for the past 4, here are my 10 favorite race day hacks that I have learned over the years.

Some of these hacks I learned on my own, while others I have learned from my athletes and other Playtri coaches. The beauty of being a Playtri athlete is that you get over 20 years of coaching and retail experience that is geared toward helping you reach your goals. We are focused on your well being and success. To learn more about our different coaching options, follow this link: https://www.playtri.com/coachinghome Hopefully these ten hacks help you on race day!

  1. Keep food simple during race week.

    What you eat during race week can make or break your race day. Don’t deviate from your normal diet much. At least 3 days before the race eliminate alcohol, and about 2-3 days before the race moderately decrease the amount of fiber and fat you consume and replace it with carbohydrates. Think a little less veggies, fruit, and dairy products and a little bit more white breads, white rice, etc.

  2. Nail the basics during race week.

    Sleep 7-9 hours a night. Avoid foods wrapped in plastic during your meals. Get off your phone at least 90 minutes before bedtime and avoid it the morning of the race. Stay hydrated. And don’t expect things to feel good on race day. (Triathlon is almost always fun and sometimes very hard).

  3. Keep three pair of goggles in your race bag.

    For all races, it is good to have some back up goggles just in case your preferred pair breaks. And if you will be swimming in open water, then it is a good idea to have goggles with different lens tints (clear, mirrored, and dark) so you can handle any light conditions that arise.

  4. Double up on swim caps.

    I’ve done my fair share of full contact open water swims. So if the swim looks like it is going to be rough with lots of body contact, then wear two swim caps to help keep your goggles on. Put one cap on, then your goggles, and finally the second swim cap.

  5. Sight off other swimmers.

    Open water swimming is both incredibly fun and challenging. When forward sighting is difficult because of water conditions or sun, sight off other swimmers. Swim next to another triathlete who is swimming at a similar pace and breath every stroke cycle toward them. Still forward sight occasionally to ensure you are going in the right direction.

  6. Rubber bands for bike shoes.

    If you are going to do a flying mount, first practice practice practice. Then on race day secure the backs of your cycling shoes to your bike with thin rubber bands so they don’t spin, flop, or even fall off as you run out of transition.

  7. Baby powder for shoes.

    If you are racing without socks, put a little bit of baby powder in your bike and run shoes to help your feet slide in more easily and help prevent blisters.

  8. Use watch timers to dial in nutrition and hydration.

    Set two timers on your watch so you don’t have to guess/remember when to eat and drink. Set a hydration timer for every 5-10 minutes and a nutrition timer for every 15-20 minutes.

  9. Create little transition packages.

    Create transition packages for T1 and T2. Put your helmet upside down, facing the correct direction, with straps open. Place your sunglasses in your helmet. If you wear socks for the bike, roll them up and place them on top of your bike shoes. For the run, attach your hat and race belt together with a small ziplock bag of run nutrition inside the hat. As you are running, you can put the nutrition in your jersey pockets and put your race belt and hat on.

  10. Zip ties for watches and safety pins for timing chips.

    Worried about losing a watch or timing chip? For your watch, thread a small zip tie through the buckle to secure it in place. And secure your timing chip by attaching a small safety pin through the velcro strap.

    AND one bonus hack…

  11. Run the tangents.

    Most triathlon run segments have multiple curves and turns along the race course. The goal of the race is to go fast, not to make sure you run the exact distance. So it only makes sense to run the course along the shortest possible route from start to finish. That means, breaking down the course into segments between curves or turns in the road to the next and running the shortest possible line. Running the tangents in a race ensures that you run the shortest distance and possibly  fastest you are able on race day.

If you have any questions about anything in this article or are interested in learning about different coaching options, please reach out to me at jim.rowe@playtri.com. Happy training and racing this year!

Jim Rowe is a Playtri Level 4 Coach and Coach Education Lead, a USAT LI Certified Coach, an NASM Certified Personal Trainer, and an Ironman and 70.3 World Championship Qualifier who works with adult athletes of all abilities from beginners to IRONMAN World Championship qualifiers. Learn more about Jim at www.playtri.com/jim-rowe.

How to Pick the Right Goggles

Time for new goggles? We’ve got you covered!

The first thing when picking out a new pair of swim goggles is to try them on, so the best thing to do is to head to your nearest Playtri store and try on goggles from different brands and models. The goal in this step of the process is comfort and fit - every athlete will prefer a slightly different shape and positioning. When you try on each pair, consider the following:

  • How do the goggles feel? Can you imagine wearing them for a long period of time? The longer you wear an uncomfortable pair of goggles, the more uncomfortable they become. So make sure they are comfortable!

  • Do the goggles suction to you face without the straps? If they don’t suction, then they can easily leak or fall off. Make sure there are no gaps in the gasket where the goggle touch your face.

  • Do you prefer goggles that fit into your eye socket or go around your eye socket? Some goggles that fit into your eye socket do not have rubber gaskets to create suction. If this is the case, try them on with the strap.

Outside comfort and fit, there are a few other things to consider, such as drag profile, lens type, and smart goggles.

For competitive swimming, such as in triathlon, it is important to think about the drag profile of the goggle while you are swimming. Ideally, your perfectly comfortable and fitted goggles would have a slim profile. This slim profile reduces drag in the water, but also keeps them close to your face when you dive in, jump in, or flip turn in the water.

Smart goggles are amazing tools for swimming. Smart goggles from FORM or Finis that give you a heads up display of swim metrics are great for training and racing. Having used these goggles for much of my recent Ironman training, I highly recommend them as long as they are comfortable and fit properly.

Also, the type of lens you use is dependent upon the environment you are swimming in and unique needs of your eyes. Here are a few common lens types and the environment they are good for.

  • Clear & light colored lenses — these are best for indoor or early morning outdoor swims when the sun isn’t as bright. Clear lenses let in the most light, while orange lenses will enhance visibility by making everything appear brighter. These do not work well in bright conditions.

  • Metallic lenses — metallic or mirrored lenses are best suited for outdoor swimming. If you do open water swimming in bright conditions with sun glare on the water, then these are a good choice. Likewise, these are excellent for outdoor pool swims during the sunny hours, especially if you do backstroke during your swim workout.

  • Dark lenses — these lenses are very versatile. Black or blue lenses are good options here. Although they don’t block the sun as well as metallic lenses, they are fine for cloudy days and indoor pools that are well lit.

Lastly, once you find a pair of goggles that fit your face, are comfortable, and address your needs, buy multiple pairs. It is always good to have at least 2-3 pair of goggles in your swim and race bag so you have back ups just in case your favorite pair breaks.

To see what goggles we currently carry at Playtri, follow this link: https://playtristore.com/collections/swim-1?pf_t_swim_type=Swim+Type_Goggles. And if you have any questions about anything in this article or are interested in learning about different coaching options, please reach out to me at jim.rowe@playtri.com. Happy training and racing this year!

Jim Rowe is a Playtri Level 4 Coach and the Playtri Coach Education Lead, a USAT LI Certified Coach, an NASM Certified Personal Trainer, and an Ironman and 70.3 World Championship Qualifier who works with adult athletes of all abilities from beginners to IRONMAN World Championship qualifiers. Learn more about Jim at www.playtri.com/jim-rowe.

How to Pick Running Shoes

How to Pick Running Shoes


There are so many different shoe brands, each making a huge variety of shoes, which can be a bit daunting. In addition, there is no greatest shoe out there that will work for every single runner. However, here are a few recommendations from the perspective of a coach who works with triathletes, runners, ultra-marathoners, and lifelong runner myself.


Run Form Informs The Shoe You Buy. When you go to buy a new pair of running shoes, bring your most recent running shoes with you. Ideally, you would work with a shoe "consultant" or "fitter" who has looked at the wear pattern on the bottom of your running shoes and has had a chance to look at your running form. After looking at your shoe wear pattern, run form and learning about injury history or lower leg and foot differences (bunions, hammer toes, etc.), the shoe consultant/fitter should be able to help you pick the correct shoe based on this information.


Buy Multiple Pairs. Once you find a pair of shoes that works well for you, buy multiple pairs. Shoe companies tend to change shoe shape and sizing every year or so, so if there is a pair that works well for you, buy 2-3 pairs that you can rotate each run. Most runners should replace their shoes every 300-500 miles, depending on the weight of the runner and their mechanical efficiency. This means every 5-6 months for the recreational or lightweight runner and every 2-3 months for the high mileage or heavier runner. 


Buy Different Types of Shoes. Having a variety of shoe types (cushioned, minimalist, race flats, trail, "super" shoes) in your rotation can positively impact your running. Each shoe type and each surface (concrete, trail, grass, asphalt, track) gives you different feedback and helps your body to adapt and learn from the different stimuli. I personally rotate through a variety of shoes depending on the goals for a workout; minimally cushioned shoes for speed work days, trail shoes for trail runs or gravel track workouts, carbon-plated shoes for race day and key workouts, and moderate to high cushioned for easy runs and long runs.


Things to Avoid. If a shoe doesn't feel good in the store, it likely won't feel good when you run. Secondly, don't pick your running shoes based on color or because it matches your running kit. Personally, I love how Hoka shoes look, but based on my foot shape and run form, Altra shoes work best for me. Thirdly, wear your favorite running socks when you buy your new shoes. (For race day shoes, try them on sock-less if you race without socks.) Finally, if your heel slides around, the shoe doesn't fit. If your toes are pinched, the shoe doesn't fit. And if part of your foot is hanging over the shoe's sole, but you really like the color, the shoe doesn't fit.


A Word About Super Shoes. The introduction of carbon-plated run shoes has led to performance benefits for runners across the running pace spectrum. These performance benefits come from the shoe altering your running economy, including altering your run mechanics in the foot and ankle. Although there is not enough clinical peer-reviewed proof that these shoes directly cause foot injuries, there is debate and anecdotal correlation that super shoes can cause injuries in your feet, such as bone stress injuries. If you do run in super shoes, don't use them exclusively. Have them as part of your shoe rotation.


To see what shoes we currently carry at Playtri, follow this link: https://playtristore.com/collections/running-shoes. And if you have any questions about anything in this article or are interested in learning about different coaching options, please reach out to me at jim.rowe@playtri.com. Happy training and racing this year!


Jim Rowe is a Playtri Level 4 Coach and Coach Education Lead, a USAT LI Certified Coach, an NASM Certified Personal Trainer, and an Ironman and 70.3 World Championship Qualifier who works with adult athletes of all abilities from beginners to IRONMAN World Championship qualifiers. Learn more about Jim at www.playtri.com/jim-rowe.

How to Race Smarter with Vo2 Calorie Expenditure Testing

How to Race Smarter with Vo2 Calorie Expenditure Testing


The first two rules of endurance sports that I share with my athletes come directly from the mouth of Craig Alexander (3x Ironman World Champion, 2x Ironman 70.3 World Champion). The first: “Don’t get injured. Don’t get sick.” And the second: “Use all available tests to help you succeed.” This is where Playtri excels at coaching. We know that success in endurance sports requires consistent and intelligent training, so for the past 20+ years Playtri has been offering performance testing that gives athletes and their Playtri coach the knowledge of how to best train and race.


My favorite performance test is a Vo2 Calorie Expenditure Test for the bike and run. This is my favorite because, when done in conjunction with Blood Lactate Testing, it gives us a ton of usable data that can be used to inform the type of training we need to become faster and also the pacing we need to have for race day. The Vo2 Calorie Expenditure Test helps eliminate a lot of guesswork and assumptions that we make about how hard we need to train or how hard we need to go on race day, allowing us to keep things simple and systematic.


The Vo2 Calorie Expenditure Test really is one of our secret weapons for long-course athletes and any athlete looking to modify body composition or improve their nutrition and recovery practices. The test takes place in our Dallas store and lasts approximately 30 minutes. From that 30-minute test, we learn how many calories an athlete burns in an hour at any given heart rate for either the bike or the run. More importantly, it also tells us how many of those calories burned come from carbohydrates or fat.


With this knowledge, your coach can tailor your training to help you become more metabolically efficient (using more fat than carbs at lower heart rate levels) if needed and prescribe appropriate heart rate pacing and nutritional goals for race day. In addition, if you are a long-course athlete and the test data shows that you are carbohydrate dependent, it may be appropriate to work with a nutritionist to adjust the quality of your food intake to become more metabolically efficient.


As a Playtri coach and coached athlete who has been both the test subject and tester, I have seen the impact this test can have. This test, in conjunction with Blood Lactate Testing, helped me and my coach put together a solid training plan and pacing strategies for races over the past two years that have helped me to qualify for both the Ironman 70.3 World Championship in 2022 and the Ironman World Championship in 2023. As a coach, I have used this test to inform training plans and race strategies for long-course triathletes, gravel cyclists, randonneurs, and ultra-marathoners.


To schedule a Vo2 Calorie Expenditure Test and learn about our other performance testing, you can follow this link: https://www.playtri.com/testing/, And if you have any questions about anything in this article or are interested in learning about different coaching options, please reach out to me at jim.rowe@playtri.com. Happy training and racing this year!


Jim Rowe is a Playtri Level 4 Coach and Coach Education Lead, a USAT LI Certified Coach, an NASM Certified Personal Trainer, and an Ironman and 70.3 World Championship Qualifier who works with adult athletes of all abilities from beginners to IRONMAN World Championship qualifiers. Learn more about Jim at www.playtri.com/jim-rowe.

Adjusting Training in the Summer Heat

Adjusting Training in the Summer Heat


Summer is here, and so is the heat and humidity that comes with the sunny blue skies. As the heat and humidity increase, so does the amount of work it takes your body to pump enough blood to keep you cool. Your sweat rate will likely increase, and your heart rate will increase even faster than normal. But do not worry! Even the most seasoned athlete goes through this adjustment period when the weather changes, so this is important that you take the proper precautions and adjust as needed to ensure the most effective training possible.


Timing and Indoor Sessions

As the summer heat comes around, try to complete your workouts early in the morning or later in the evening to ensure you are not training at the day's peak temperature. It is important to schedule your training to get the most out of each session, and while training in 80 degrees early in the morning is not the most comfortable, it will be more tolerable than 100 degrees in the afternoon. You should also look into completing quality sessions indoors on the bike trainer or treadmill to ensure you are still getting in quality workouts (see below regarding modifying speed sessions).


Hydration

The summer brings about higher temperatures and higher humidity, raising your core temperature and increasing your sweat rate. The more you sweat, the more your body must work to cool down your core body temperature. More sweat loss means more fluid and electrolyte loss, sodium, for example, which can impact muscle function and increase your heart rate even more. The more sweat you produce, the more sodium your body loses, which can bring about cramping and muscle dysfunction. It is important to not only stay hydrated during your sessions but to stay hydrated throughout the day and as a recovery process. Taking a water bottle on your run, such as this Orange Mud Handheld Hydration Bottle, or a couple of bottles on your bike ride or swim can help ensure your body is topped off with fluids and necessary electrolytes. One way to ensure you are taking in the proper amount of sodium during your sessions is to schedule a Playtri Advanced Sweat Test and talk with a coach about properly hydrating.


Training Stress Increase

One of the most important aspects of training is to understand the effect of temperature and weather as it pertains to training stress; outside factors impact the amount of work the body must do to achieve the given workout. Heat and humidity make workouts objectively more difficult, especially if you are used to cooler weather and have yet to acclimate to the heat. Athletes must adapt to the heat and allow their bodies to get acclimated to the heat; increasing training stress by workout volume and heat adaptation at the same time too quickly can increase the risk of injury or burnout. 

This is where looking into coaching can benefit any athlete because the coach's job will be to monitor heat adaptation and training load as well, as to ensure that you, as an athlete, are adjusting properly to the heat and humidity. The volume may not increase as quickly as the summer heats up, but it is important to trust the process. If you are interested in learning more about coaching, check out our Playtri Individual Coaching Plans.


Train for Time, Not Distance (and DON'T be afraid to go SLOW)

During the summer months, your training pace will likely slow down considerably, but that does not mean you are losing fitness. An hour easy run is an hour easy run, whether it is completed at 8:00 minutes per mile or 10:00 minutes per mile. The time on your feet is what you are looking for when it comes to training stress, so slow down your run to ensure your heart rate is not going too high. If you feel you are working harder than you should be, slow down. 

Triathletes tend to work too hard because they feel as though they will lose fitness if they go easy, but when you go too hard too often, your body will negatively respond to unnecessary training stress. Easy workouts are a crucial part of training, so embrace the easier pace and allow your body time to adapt. When in doubt, go easier.


Modify Speed Sessions as Needed

Tempo runs, hill workouts, and speed sessions will feel even more difficult in the heat and humidity. You can continue these workouts as prescribed when you are acclimated to the heat, but it is important to modify them as needed to ensure you are getting the most out of your sessions. For example, if you are given a speed session with a 1-minute speed interval, followed by a 4-minute easy interval, you may be used to just slowly jogging the easy interval. However, allow yourself to stop or walk during that time so that your speed interval is done correctly. Take your focus off your pace because, during this time, your perceived effort is what matters.

The most important aspect of training in the summer is to continue enjoying your training. If you feel you are getting lightheaded or struggling with a given session, it is OK to bail and allow yourself to recover. This is another opportunity to discuss training with a coach to ensure you are properly training for whatever your goals may be. I am currently taking on athletes, so if you are looking to discuss coaching as an option, contact me at michael.rourke@playtri.com! Happy Training!


Coach Michael Rourke is a Level 2 Playtri Coach and an American Swim Coaches Association Level 4 swim coach. He coaches junior and adult triathletes of all levels, as well as high school elite swimmers. He is also a 70.3 World's Qualifier and USAT Age Group Nationals Qualifier.


Off-Road Triathlon Racing & Training

By Coach Peter Balyta

Off-Road Triathlon Racing & Training


Triathlon is a race that consists of three consecutive events. Most commonly, these are swimming, biking, and running. Triathlon races allow you to test your fitness, resilience, and mindset in a healthy and fun way. Triathletes love these races because they like to compete, strive for superior performance, want to test their endurance, speed, strength, and mental fortitude, or simply prove to themselves that “anything is possible.” As triathletes, we are always striving to get better and are driven by a growth mindset, but we are also attracted to the sport because we love the lifestyle and all of the benefits that come from triathlon training. Let’s face it, over 90% of what we do falls into the category of training or active recovery. This is also where the real gains, adaptations, or evolutions happen. 


Have you ever wondered about how to spice up your training and add a sense of adventure to your triathlon experience? If so, you might be ready to explore off-road triathlon. As the name might suggest, off-road triathlons are triathlons that are done off-road. They involve swimming in natural open water, mountain biking, and trail running. XTERRA organizes the most popular off-road triathlons, but many off-road triathlons are hosted by more local or regional organizations like Race Revolutions in the State of Texas.

In order to help you determine if off-roading training and racing is for you, I have a short assessment to assist you in determining fit. 

•          Do you enjoy adrenaline boosts, feeling exhilarated, adventurous, and free?

•          Are you struggling to incorporate more strength training and functional fitness into your triathlon training?

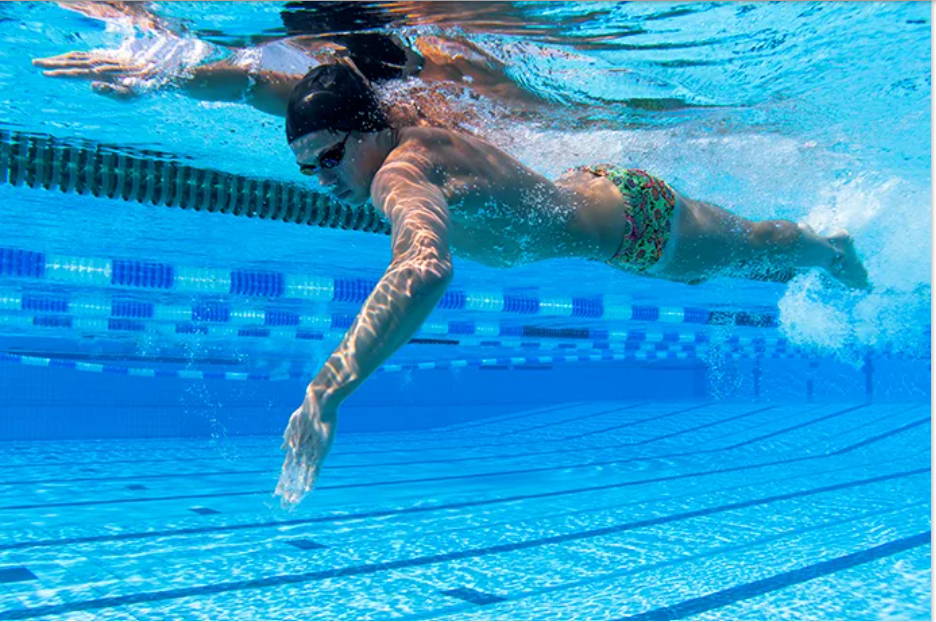
•          Are you getting a little bored of staring at that black line at the bottom of the pool while doing endless laps or hugging that white line for miles and miles while riding on concrete or chip-seal? 

•          Has running loops around your favorite track, doing hill repeats or speed work along your favorite stretch of road lost its pizazz?

•          Are you interested in adding a sense of adventure to your bike and runs?

•          Are you wanting to connect with nature but struggling to find ways to incorporate it into your triathlon training?

If you answered yes to any of the above questions, you should consider off-road triathlons. If you answer yes to more than one of the questions, it’s time to take it off-road.

The views from the natural open water swims are guaranteed to help ground you with nature as you swim your heart out. The rush of mountain biking for the first time is a mixture of excitement, fear, and joy. You feel your heart pounding and become almost breathless as you power up those hills before quickly seeing what lies ahead in the descent, filled with twists and turns, bumps and drops, stream crossings, and more steep climbs. You are “in the moment” as soon as you start the descent. The adrenaline rush and sharpening focus keep you present through every second of the descent. It’s almost like all of your senses awaken as you pedal through dirt, roots, rocks, and streams. You feel so alive when flying down the trail, whipping through turns, navigating obstacles, and hitting those drops and bumps. You just can’t help feeling like a kid again.  


There are so many reasons to consider off-road triathlon. Below are my top five reasons.

They are fun and exciting. I started training and racing off-road triathlons this season, and it’s been incredible. After my first race, I signed up for three more!   I guess that I got addicted to the thrill of riding and running through tough and scenic trails. 

Off-road races force you to be 100% present and focused on the moment. Not knowing what is around the corner or on the other side of a sharp drop forces you to be “in the moment” the entire time and ready for anything. You don’t have to get yourselves into a state to grind it out for hours on a long flat road, nor is it possible to do this when off-roading. Regardless of what you have going on at work or at home, these races act like a big “pause button” for those things and anything else. Yoga and meditation also help us hit the “pause button” by turning our focus inwards by living each moment through our breath. But I promise, being present and living in the moment is about the only thing off-road triathlon and yoga have in common. Tree pose means something completely different and is something to be avoided in off-road triathlon.

Off-road triathlons connect you with nature. The training and racing allow you to connect with nature in ways that awaken all of your senses. You get to sneak peeks at some breathtaking views along the way. Whether it’s the fresh air, the smells of the trail, the sounds of the wildlife, or the wind, water, and dirt on your face, you truly feel connected to nature.

Off-road training and racing force you to improve your core strength and functional fitness. Navigating through technical terrain with many ups, downs, twists, and turns on uneven surfaces will certainly help build core strength. Constantly switching gears, braking, cornering, and hanging on while flying at top speeds will make you discover muscles that may been dormant for a long time despite a training program which may already include core strength training. Off-road training can be great cross-training to complement a standard or IM training program.

The off-road and XTERRA communities and cultures are a little different. These are people that share a passion for adventure and appreciate nature and comradery is unlike anything that I have experienced before. For example, almost all athletes stay and celebrate until the last racer crosses the finish line. How cool is that? While you will see some incredible bikes out there pushing the limits of innovation, the races themselves are low-frills. The organizer focuses on creating the best race experience for the athletes as opposed to staging big balloons, blow-up arches, or fancy red carpets. These events have a grassroots feel to them. As these races become increasingly popular, I hope they maintain that feeling.

It is also important to realize that off-road triathlon is not for everyone. As triathletes, we all appreciate and enjoy a good adrenaline shot and the racing thrill. However, the constant surges of adrenaline mixed with fear and joy come with increased risk and can be too intimating for some people. Off-road training and racing can also be physically and mentally demanding. I will not argue that they are more demanding than traditional triathlons, but they are certainly different.

If you are still reading this article, you may seriously consider getting involved in off-road triathlon. These are a few things to consider as you get started. First and foremost, getting into off-road triathlon is an excellent excuse for getting new gear – and yes, that means acquiring a mountain bike. Do not pass up on this opportunity. You will also need a pair of mountain biking shoes and trail running shoes. A hydration pack is also extremely helpful when you are getting started because you don’t have many easy flat stretches during the bike course to grab a water bottle for a quick sip of water or your favorite electrotype mixture. Trust me – you will want both hands on the handlebars. You will also want a good pair of mountain bike gloves to help absorb some of the vibrations and protect those hands when you wipe out. Yes – little spills are more common in off-road triathlon than in standard triathlon. Getting the right fit with your equipment is always important, but it’s especially important in off-road triathlon. Making sure your bike and tires are trail ready is also so important, given the technical nature of the terrain. You can find all of the equipment you need at your local Playtri store. They could also help you with bike fitting.

You will need to adjust your training to incorporate more core strength and functional fitness, and of course, you will need to spend a good amount of time on your mountain bike on actual trails. Time on your MTB will help you strengthen your core and other muscles that you likely haven’t relied on in standard triathlons, like your fingers, hands, and forearms. You will quickly see that the strength and agility required to hang on while flying down trails at top speed is significantly greater than what you use to hold your aero position when speeding down fast hills during standard triathlons. Time on your MTB will also help you develop specific MTB skills like overall bike handling, gear shifting, braking, cornering, climbing, and navigating different types of terrain while going up and down. You will also quickly notice that your overall pace will be much lower on your MTB than on your speedy tri bike or road bike. Don’t worry about that – it’s perfectly normal, given the terrain. 

Training with heart rate and power in off-road triathlon is also quite a bit different compared to how we use these performance measures. These metrics will be much more valuable when doing a post-race or workout analysis vs being used to monitor real-time performance. Given the lagging nature of HR monitors and the constantly changing terrain, your HR data will be most valuable in analysis. And you really want to keep your eyes looking in front of you vs at your bike computer. While on a MTB, you will also see many spikes in Power output with all of the quick ascends and descends. The performance data you get from your HR monitor and Power meter remain very important as you dial in your fitness and overall training. It also makes for great post-race and post-workout conversations with your coach. 

The planning and execution of your hydration and nutrition will change, and like always, practicing with what you will use on race day is very important. It will feel like there is never a great time to drink or eat while on the MTB course so I highly recommend that you keep it simple. Easy access is key to one hydration/electrolyte solution and one fuel solution.

Riding the pre-race course is a smart thing to do in any triathlon. However, in off-road triathlon, I believe it is mandatory to ensure a safe and fun experience as you push your limits on race day. The bike leg in off-road triathlons often consists of one loop (for Sprints) or two loops (for Fulls) so it’s pretty easy to do one loop the day before the race. 

As with all triathlon training, I would encourage you to seriously consider working with a coach that can partner with you to create a customized training plan that suits your goals, abilities, availability, and lifestyle. Coaches are instrumental in helping you avoid pitfalls, lower your chances of injury due to overuse, and unlock your potential to maximize performance. They also make for great accountability partners. 

Also, I highly encourage you to reach out to folks in the off-road community. They are a wealth of knowledge and are happy to help you by sharing great tips and motivation. Do expect them to invite you for MTB rides quickly (it’s what they do), and I encourage you to take them up on their offers. The best way to get into off-road triathlon, MTB, and trail running is to get out there and do it. Start at your comfort level and build up from there. If you have any questions regarding off-road triathlon or Playtri Coaching, don’t hesitate to me at peter.balyta@playtri.com.

Triathlon is not about what you get at the end of the race (i.e. medal, podium, …). It’s about who you become along the way. Get out there. Ride and run those trails and see what happens! 


Peter Balyta is a Playtri Level II Coach, a USAT Level I Certified Coach, an Ironman Certified Coach, and a BICP Rider Leader for MTB. Peter is committed to helping athletes live the life they want to live. He delivers practical advice to help athletes of all ages and abilities drive superior performance in their training and racing while balancing their family, work, community and fitness goals. Peter brings his 20+ years’ experience as a corporate executive and community advocate to his triathlon coaching. Learn more about Peter at https://www.playtri.com/peter-balyta.


How to Safety Check Your Bike

How to Safety Check Your Bike

About 10-12 years ago I was on a long bike ride in the Catskill Mountains in New York with a few friends. Our route took us up and over a few mountains before hitting some short, steep climbs and ending on some flat roads for a few town line sprints. Of course, I was running late, so I hastily grabbed my road bike and threw it on the bike rack to go meet my friends. About 10 minutes into our first ascent, my front wheel began to wobble and my steering became mushy. Thankfully, I noticed these things before we hit our first descent, so I calmly told my riding buddies to pull off to the side of the road. Once we stopped, I noticed that my headset was loose, my front tire was a little flat, and my front skewer was not fully tightened.

Doing a safety check before every bike ride is an important part of preparing for a safe and enjoyable ride. And it doesn’t matter if the bike you are riding has been in storage for years or you ride it 200+ miles every week. Long term storage and regular use can both lead to degradation and/or damage of components and the frame. At Playtri, we recommend that if your bike has been in storage for a long time, get it inspected by our mechanics before using it. And if you regularly ride your bike, it is important to have it serviced every 3-4 months. Still, a pre-ride safety check will help you keep cycling in between service appointments.

For my pre-ride safety checks, I follow a “M-Check”, which is a simple way of saying I start my safety check from the rear wheel and work my way to the front wheel in the shape of an M; going up the seat stays, down the seat tube, up the down tube, and down the fork. Using a regular pattern for your safety checks ensures that you don’t miss anything. The first few times of doing this check may take a while, but once you get in the habit it will go quickly. To help you get a sense of how to do an M-Check, here are the steps.

1. Start at the rear wheel. Inspect the tire for wear and tear. Top off the air in your tires. Check to make sure the wheel is spinning smoothly and the rear skewer or thru axle is closed properly. Inspect the rear cassette and rear derailleur for any debris, built up gunk, and abnormal wear.

2. Moving up the seat stays, inspect the seat stays for any damage. If you have rim brakes, check the rear brake at this point. Making sure it is properly aligned and the brake pads are in good condition. (If you have disc brakes, you inspect the rear brake in the previous step.)

3. At the top of the seat tube inspect your saddle and saddle rails. Inspect the seat post bolts and the bolts that connect your saddle to the seat post. Tighten any bolts that are loose. Moving down the seat tube, check for any damage to the frame. At the bottom of the seat tube, make sure your front derailleur is clear of debris and road grime and that it is shifting properly. Grab a crank arm and give it a tug to see if there is any lateral movement. If there is movement, have your bottom bracket inspected. (Yes, it is possible for a crank arm to fall off while you are riding if you ignore this. No, don’t ask how I know this.) Also check your chain for surface rust. Clean and lubricate if there is any rust.

4. As you move up the down tube, check for any damage to the frame. Once you are at the top of the down tube, check your headset. Put the front brakes on and hold the handlebars, pushing them back and forth. There should be no play in the headset. If there is movement, it suggests that your headset needs to be serviced. Also, inspect the stem, handlebars, and shifters for damage.

5. Finally move down the fork, inspecting for damage. Check your brakes, your front skewer or thru axle, tire, tire pressure, and wheel.

Again, the first few times you inspect your bike in this fashion, it will take some time. And if you aren’t exactly sure what you should be looking for, then scheduling a one-on-one with a coach or speaking to the sales associates at Playtri can help tremendously. Remember, Playtri has been in the coaching business for over 20 years and in the bike shop business for almost as long. Our goal is to help you use your bike in a safe and enjoyable manner. If you have questions about anything in this article or are interested in learning about different coaching options, please reach out to me at jim.rowe@playtri.com. Happy training and racing this year!

Jim Rowe is a Playtri Level 4 Coach and Coach Education Lead, a USAT LI Certified Coach, an NASM Certified Personal Trainer, and an Ironman and 70.3 World Championship Qualifier who works with adult athletes of all abilities from beginners to IRONMAN World Championship qualifiers. Learn more about Jim at www.playtri.com/jim-rowe.

Biomechanics of Running Overview

Biomechanics of Running Overview

For over 20 years Playtri coaches have worked with triathletes and runners on improving their run form and decreasing their chance of injury. As a coach and a Playtri coached athlete, I have seen the impact that working on run form with a coach can have on an athlete’s ability to race well. Although running is arguably the simplest and easiest of the three disciplines of triathlon to practice, it is also THE discipline that leads to the greatest cause of injuries. Running well on tired legs at the end of a triathlon is a skill that involves improving your run form, increasing strength, and decreasing injuries. To help you get a better sense of how to address these issues so you can run faster, here are some run form and injury considerations that I have seen over the past few years with athletes I work with.

Neutral Posture

Adopt the phrase, “Run Tall,” to help address postural issues. Many age group athletes sit much of the day and then hop on a tri bike before running, both of which can contribute to tight hips. It is important to foam roll your hips to help loosen them up. And also run in such a way that allows your body to be naturally stacked (your head over your shoulders over your hips over your feet) with a slight lean from the ankles. If it helps, you can imagine someone pulling you along with a rope around your hips and your goal is to keep your body nice and aligned as you move down the road. This means that your head position should be neutral with your eyes looking 10-12 feet ahead of you. Your chest is neither sticking up nor collapsed, and your shoulders are relaxed. Your hips are centered and leveled with your shoulders and head.

Foot Strike

If you watch the best triathletes or runners, either at a local race or the professionals, you will see a variety of foot strikes (primarily heel strokes or midfoot strikes, the forefoot striking tends to come out when the pace increases). It isn’t so much about which part of the foot hits the ground, but where it hits the ground in relation to your center of gravity. Ideally, we want the foot to strike beneath or near your center of gravity with your shin creating a 90-degree angle with the ground at contact. What we don’t want is overstriding, which puts an extra amount of strain on the stabilizing muscles in your legs, hips, and lower back. This maxim holds true for foot strike: If it ain’t broke, don’t fix it. As long as your foot strike isn’t causing injury, it isn’t worth the time and energy to change it.

Cadence

Many age group athletes I have worked with over the years have started with cadences near 140-145 steps per minute. At Playtri, we advocate for a fairly quick cadence, anywhere from 160-190 steps per minute, because a higher cadence can cut down on the chance of injury while also increasing your run speed. If your cadence is low, it is a good idea to address that in the off season with the use of a metronome and gradually increasing your cadence by 2-3 steps per minute so that your body can adapt to the new higher cadence.

Arm Drive

At Playtri we look for an arm drive that emphasizes pulling back with the elbow, allowing the arm to naturally swing forward, and hands that do not cross the midline of the chest. Elbows are bent anywhere between 70-90 degrees, with hands relaxed, and arms and hands close to the body.

Injury Considerations

There are two injury issues that I have seen regularly in the past few years. The first is running in carbon plated shoes, or Super Shoes. Recent studies have shown that although carbon plated shoes do increase speed, the stiffness of the shoes can contribute to foot injuries. If you race in Super Shoes, consider wearing them only minimally in your training.

Second, weak hip abductors like the gluteus medius. If you have weak hip abductors, you are more likely to see your knees collapse in while you run, which puts more strain on the stabilizing muscles around your hip girdle and lower back. Strong hip abductors are essential for holding a solid run form as the race gets longer and fatigue sets in. Doing strength exercises like banded squat walks, lateral walks, fire hydrants, clamshells, and weighted lateral lunges help address hip weakness.

Hopefully this article has helped introduce you to the importance of run form, and strength and mobility work around the hips. If you are interested in performance testing or scheduling a one-on-one with a coach, you can find more information here and here. And if you have questions about anything in this article or are interested in learning about different coaching options, please reach out to me at jim.rowe@playtri.com. Happy training and racing this year!

Jim Rowe is a Playtri Level 4 Coach and Coach Education Lead, a USAT LI Certified Coach, and NASM Certified Personal Trainer who works with adult athletes of all abilities from beginners to IRONMAN World Championship qualifiers. Learn more about Jim at www.playtri.com/jim-rowe.

Hydration for Training & Racing

Hydration for Training & Racing

Staying hydrated plays an important role in your training and racing as an endurance athlete. Your training day or race day can be made or broken by the hydration decisions you make that day and in the days leading up to it. For over 20 years, Playtri coaches have been helping athletes create sustainable and simple hydration plans for their training and racing through performance testing and individual coaching plans.

Staying hydrated includes consuming water and sodium (a micronutrient or electrolyte lost in heavy quantities in sweat that is crucial to the absorption of water). Unfortunately, many age group athletes are dehydrated on a daily basis. Without proper hydration we don’t just see a performance decline, we are also negatively affecting our immune system, muscular function, blood pressure, body temperature regulation, digestive system, and energy metabolism. Typical daily water loss through sweat, urine, feces, and exhaled air is 2-3 liters for an adult. Net loss for an athlete can be anywhere from approximately 1.5 liters to 6.75 liters depending on the athlete’s size and environmental conditions.

To avoid dehydration on a daily basis, it is a good idea to always have a cup or water bottle with you, so that you can regularly take drinks. If, like many age group athletes, you are on the go with family and work functions soon after training is done, then it doesn’t hurt to set a timer on your phone or watch as a reminder to take a drink. I tell my athletes that a good starting point is to drink enough water throughout the day so that they are urinating approximately every 2-3 hours.

During training and racing, dehydration can have a direct impact on our ability to perform well. At just 3-4% dehydration, an athlete will start to experience a reduction in maximal aerobic power and endurance, increased rate of overheating from lower plasma volume, and compromised thermoregulation. At 5%, an athlete will experience decreased concentration and focus, headaches, increased respiratory rate, decreased cardiac output, chills, nausea, and a rapid pulse. Thus, we want to avoid anything more than 2% dehydration (or 2% decrease in body weight) during training and racing.

To help you get a good idea of where to start with your training and racing hydration strategy, here are some general recommendations that we regularly give to our individual coached athletes.

· For all key workouts, weigh yourself naked before and immediately after to see what percentage of body weight you have lost. Also note the time of day, temperature, humidity, altitude, menstruation phase (for those who menstruate), amount of water drank, amount of sodium consumed, and number of calories consumed.

· A good starting point is to plan to consume at least 1 bottle of a low-calorie electrolyte drink per hour while biking.

· For running, plan to consume at least 10 oz of a low-calorie electrolyte drink or water with salt capsules per hour.

· Remember that temperature, humidity, altitude, and menstruation phase can have a direct impact on your hydration strategy. For hot, humid (or really dry), or high elevation training and racing, adjust your hydration strategy to include drinking more.

Again, these are just general recommendations. Although we believe these recommendations work for the vast majority of triathletes, it certainly doesn’t hurt to work with a coach to help you plan

your hydration. And if you want a more specific nutrition and hydration plan, consider our performance testing options at Playtri Dallas (www.playtri.com/testing). A calorie expenditure test will help you know how many calories you expend at different heart rates, a sweat test will help you know how to hydrate to replace lost electrolytes, and a resting metabolic rate test will help provide you with a baseline for your daily nutrition planning.

Whichever way you go—experimenting with these recommendations, working with a coach, and/or getting performance testing—remember to get started now! Use your training to practice your hydration strategy so that race day is an enjoyable, challenging experience.

Jim Rowe is a Playtri Level 4 Coach and Coach Education Lead, a USAT LI Certified Coach, a NASM Certified Personal Trainer, and an Ironman and 70.3 World Championship Qualifier who works with adult athletes of all abilities from beginners to IRONMAN World Championship qualifiers. Learn more about Jim at www.playtri.com/jim-rowe.

Biomechanics of Cycling Overview

Biomechanics of Cycling Overview

As a coach, bike fitter, and a performance tester, I regularly get the question: “How do I get faster on the bike?” The simplest answer is: Ride more. However, that does not take into consideration of how your body interacts with the bicycle. So, the more accurate answer is this: You can ride faster on the bike by maintaining maximum sustainable power output while minimizing drag.

By working with a coach, you can make gains in cycling endurance, power output, bike handling, and muscular strength and endurance. All of which has been addressed in other articles by Playtri coaches. Likewise, although minimizing drag can be impacted by your cycling kit, helmet, and wheel choices, how your body interacts with the bike has a larger impact on minimizing drag.

A proper bike fit ensures that your bike is the correct size and your position on the bike is optimal for performance, safety, and efficiency. Every bike fit begins with a cycling-specific flexibility and functional strength assessment. With over 20 years of experience fitting and coaching cyclists and triathletes, our first priority is to ensure that your bike fits you safely. We work to ensure your body position isn’t too far forward, too far back, too high, or too low on the bike which can make you unstable. Although a lower front end is more aerodynamic, it might not be sustainable for you. And we pay close attention to the 3 points of contact in cycling: your pelvis on the saddle, hands on the handlebars or aerobars, and your feet on the pedals. If you feel any numbness in these contact points, there is either something off with your bike fit, your cleats need to be adjusted or replaced, shoes or bike shorts need to be replaced, or there is a muscular imbalance that needs to be addressed. Of course, a bike fit is not a one-and-done thing. As your body adapts to the training and changes as you age and gain fitness, it is important to reassess your bike fit. We recommend that you get a new bike fit at least once a year depending on your fitness goals. You can learn about our different bike fits and schedule one here.

Once your bike fit is done, I then encourage my athletes to continue to pay attention to how their body interacts with the bike. There are a few things I particularly pay attention to with my athletes: Is their upper body still or rocking back and forth while riding? Are there dead spots in their pedal stroke or is it smooth and circular? Do their knees track properly or do they collapse in or outward? Assuming that the bike fit is good, we can then start to address the biomechanical issues that are related to these issues. To maintain a relaxed, still upper body, we focus on developing core strength. For dead spots in the pedal stroke, we incorporate high cadence, low cadence, and single leg drills into our training. And to help your knees to track correctly, we work on strengthening or releasing your gluteus maximus and hip abductors (depending on whether your knees collapse inward or outward).

So, what’s the take away from this article? If you want to get faster on the bike, your bike fit and how your body interacts with the bike matter a lot. If you increase your riding, yes you will gain fitness, but at some point, your bike fit and body function will impact your ability to sustain maximum power. So, remember: 1) Make sure you have a good bike fit that allows you to ride your bike in a comfortable, safe, and efficient fashion. Update it every year. And 2) Pay attention to how your body moves on the bike. Are you able to maintain a solid but relaxed upper body position while your legs function as smooth, fluid pistons? Are your feet remaining relatively parallel to the ground? And are your knees tracking correctly?

Again, if you would like to learn more about bike fits and to schedule one, you can find more here. If you are interested in performance testing or scheduling a one-on-one with a coach, you can find more information here and here. And if you have questions about anything in this article or are interested in learning about different coaching options, please reach out to me at jim.rowe@playtri.com. Happy training and racing this year!

Jim Rowe is a Playtri Level 4 Coach and Coach Education Lead, a USAT LI Certified Coach, and NASM Certified Personal Trainer who works with adult athletes of all abilities from beginners to IRONMAN World Championship qualifiers. Learn more about Jim at www.playtri.com/jim-rowe.

Nutrition + Hydration for Long Course Racing

Nutrition and hydration is the number one topic that comes up in my work as a coach with a wide range of endurance athletes. Whether it’s a first time Ironman, ultramarathoner, Ironman World Championship Qualifier, or a randonneur, this is the topic that gets the most discussion. Why? Because it can make or break your race. Since the triathlon season is just around the corner (I just received my athlete check in email for Ironman 70.3 Texas), this topic seems timely.

As a coach, I want you to have a very simple and systematic approach to your nutrition and hydration on race day. Your nutrition and hydration strategy should be repeatable and easy to follow because your focus ought to be on the race and not trying to count calories. This strategy can be developed through two different approaches: trial and error; or testing your sweat content, your calorie expenditure, and knowing your heart rate zones.

Through testing we can determine what heart rate zones are the best for you based on the amount of calories you burn at different heart rate levels with a Vo2 Calorie Expenditure Test, and we can determine how much sodium you need to replace with a Sweat Test. Then we can figure out which hydration products offer the best sodium replacement for you and how many calories you need to consume during the bike and run. We then use these products during Key training sessions to make sure they sit well in your stomach and do not cause any gastrointestinal distress.

Testing is the best way to get these results but it may not be possible for you to come to Dallas for these tests if you live further away or if finances are tight. If that is the case, then trial and error is the way to go. With this approach you need to be incredibly systematic in your nutrition & hydration trials. Take notes on everything. Weigh yourself naked immediately before and after your longer key training sessions so you know how much water your have lost. Write down how much sodium, water, and calories you consumed per hour so that you can make adjustments as you continue in your training. Those who menstruate should track where they are in their menstruation cycle since different phases can effect hydration levels and performance. Whether you go with testing or trial and error, a general rule of thumb is to keep weight loss to less than 2% of your starting body weight. Any more than 2% means you are experiencing a level of dehydration that can be detrimental to your well being.

As you start out working with a coach or figuring out your nutrition and hydration strategy on your own, here are some guidelines to get you started.

Female athletes can look to consume at least 1 bottle of low calorie electrolyte drink per hour and 150-250 calories per hour on the bike. On the run, start with 100-150 calories per hour and hitting the aid stations for hydration. Male athletes can look to consume at least 1 bottle of low calorie electrolyte drink per hour and 250-350 calories per hour on the bike. While on the run, start with 150-200 calories per hour and hitting the aid stations for hydration. As a starting point for hydration, I recommend products from Skratch Labs, Precision Hydration, and The Right Stuff. For nutrition, I recommend Honey Stinger waffles and gels like GU. The amount you drink and eat changes based on intensity and environmental factors like temperature, humidity, and elevation.

If you plan to use the nutrition and hydration that is available on course, then practice with it throughout your build to race day so that your gut is trained accordingly. And if you plan to bring your own nutrition and hydration then think through the logistics of how you will carry your nutrition and hydration for the entire race. Will you create a “super bottle” or two of your hydration product to sip throughout the race and supplement with water at aid stations? Will you rely on extra bottles of hydration product in your special needs bag? Will you use salt capsules for the run? How will you carry your preferred nutrition products on the bike and the run?

If you are only now just thinking about this, it may seem overwhelming. Do not be discouraged. Every body is different, which means every other athlete on course with you will have had to think through this as well. Part of the excitement of coaching endurance athletes is working with them as they figure out what will sustain them in their races. The other part is celebrating their successes!

Jim Rowe is a Playtri Level 4 Coach, a USAT LI Certified Coach, and NASM Certified Personal Trainer who works with adult athletes of all abilities from beginners to IRONMAN World Championship qualifiers. Learn more about Jim at www.playtri.com/jim-rowe.

Nutrition & Hydration: Short vs Long Course

Nutrition & Hydration can make or break your race day. Although we, the coaches at Playtri, are neither dieticians nor do we masquerade as them on social media, we have learned over the years that certain recommendations can be useful and beneficial for most endurance athletes. Of course, if you have exceptional circumstances such as health related issues, then we encourage you to connect with a registered dietician who has experience working with athletes and sports nutrition to help you plan your nutrition & hydration strategy.


Nutrition & hydration in triathlon is much like camping; the more extreme your camping or racing is, the more preparation and focus on execution needs to be at the forefront of your plan. Sprint distance races are a bit like RV camping, while Ironman distance races are a bit like wilderness camping in the desert or frozen tundra. You can get by with making mistakes when you go RV camping, but the mistakes come back and bite you in extreme camping situations.


However, triathletes often prepare for races a bit backwards; over-preparing for short course with gels and water bottles galore AND under-preparing for long course with little nutrition and hydration pre-planned for race day. Before we get into some general recommendations for short course and long course, please hear this: Use your training sessions to prepare for race day! You can’t wing it during training and expect things to go well on race day.


Generally speaking your body functions on a mix of carbohydrates, proteins, and fats. Our main fuel source for necessary bodily functions (like brain activity) and physical activity comes from carbohydrates and we have approximately 2 hours of carb fuel in our bodies at any given time. Thus it is important to plan your race day nutrition around carbohydrate consumption. (You can teach your body to utilize bodily fat for fuel, but that’s a topic for a different day and you still will want to take on some carbohydrates on race day.)


A general rule of thumb for women for nutrition is to consume approximately 100-200 calories per hour on any run 1.5 hours or longer and approximately 150-250 calories per hour any bike 2 hours or longer. Likewise, women should look to consume at least 1 bottle of a low calorie electrolyte drink per hour for any bike/run 1 hour or longer. Men: consume approximately 1 bottle of electrolyte drink per hour for any bike/run 1 hour or longer; approximately 150-350 calories per hour on any run 1.5 hours or longer and approximately 250-350 calories per hour on any ride 2 hours or longer. Variations in intensity, heat, humidity, and altitude will bring those numbers either up or down. It is good to start dialing in your nutrition at the lower end of the calorie range and adjust upward if needed. In addition, the longer your race/training the more calories you will need overall and the more solid you want your nutrition on the bike to be. We’re not talking meatball subs on the bike, but we do suggest that you go with some kind of nutrition bar or easily digestible solid like PBJ on white bread.


So if you are racing a triathlon and will be finishing in less than 2 hours you most likely won’t need any nutrition on race day. Plan on having a small bottle of electrolyte drink and a few gels available on the bike, and a gel or two available on the run.


If you are racing a triathlon and will be finishing in 2-4 hours you will need to plan a bit more. For the bike you can go with either gels or solid food or both and then stick to gels on the run, while making sure that you have a bottle of electrolyte drink per hour on the bike and hitting the aid stations on the run for water/electrolytes.


For triathlons in the 4-6 hour range you can go with a mix of gels and solids on the bike and then gels/chews for the run. Again plan on at least 1 bottle of electrolyte drink per hour on the bike and hitting the aid stations on the run.


And finally, any triathlon in the 6+ hour range go with mostly solids with some gels on the bike and gels/chews on the run with at least 1 bottle of electrolyte drink per hour on the bike and treating the aid stations like a buffet line.


Again, these are just general guidelines. Although we believe these general guidelines work for the vast majority of triathletes it certainly doesn’t hurt to work with a coach to help you plan your nutrition and hydration. And if you want a more specific nutrition and hydration plan, consider our performance testing options at Playtri Dallas (www.playtri.com/testing). A calorie expenditure test will help you know how many calories you expend at different heart rates, a sweat test will help you know how to hydrate to replace lost electrolytes, and a resting metabolic rate test will help provide you with a baseline for your daily nutrition planning.


Whichever way you go—experimenting with these recommendations, working with a coach, and/or getting performance testing—remember to get started now! Use your training to practice your nutrition & hydration strategy so that race day is an enjoyable, challenging experience.


Coach Jim Rowe is a Playtri Level 3 Coach, and also holds a USA Triathlon Level I Coaching Certification, a UESCA Triathlon Coaching Certification, and a TRX Coaching Certification. He is available for individual coaching, one-on-one sessions, and performance testing. He can be reached at jim.rowe@playtri.com.

Metabolic Testing: Avoid the Bonk

Metabolic Testing and the Bonk

As many of you know, I spend a few hours every day getting to interact with retail customers at the Playtri Store. It’s a great experience for me as a coach, because I get to hear and consider all the questions that athletes have regarding the sport. It often leads to quality conversations that hopefully have a positive impact on the athlete’s training and racing.

A common question prior to every big Ironman race is “I’m trying to figure out my nutrition – what should I do/use?” I always hope athletes are asking for a race months down the line, but more often than not, they’re asking for a race in a week or two.

First, know that nutrition is king in Ironman. It isn’t a last minute consideration. All the quality training in the world can fall apart in a blink on race day with the wrong nutrition strategy (I’m not even going to get into hydration here – see the last email article on hydration and electrolytes).

Let me explain. Athletes who have been training or racing long course have likely all experienced “the bonk” – that dreaded sensation of suddenly hitting a point where either the muscles stop firing, the brain stops thinking, or, you know, both. It will quite literally stop you in your tracks. It happens reasonably often in triathlon, and exponentially more at the Ironman distance. Note that bonking is NOT the same as cramping (another evil villain of endurance sports), though they can definitely happen concurrently!

Bonking occurs due to a lack of carbohydrates available to brain and/or muscles. Why does this happen? Without going too deep into the science, carbohydrates and fats are both potential energy sources for the creation of ATP (Adenosine Triphosphate), a chain of three molecules that split to create the energy that causes muscles to contract (allowing us to swim, bike, run, etc.). Of the two potential energy sources (fat and carbs), carbohydrates are easier for the body to access for the process of creating ATP, so the harder we work (swimming, biking or running faster/harder), the more our body moves towards relying on carbs instead of fat. This would be great, except that, while our bodies have massive stores of fat (that’s not a comment on the reader’s weight – even the leanest athlete has enough stored fat for days at any given time), our carbohydrate stores are much more limited – perhaps 500g (2000 kcals), give or take 100g.

This is where we run into a problem. Some athletes may burn through 1000 kcals or more of carbohydrates in an hour at high intensities, meaning they could easily burn through their stores before their event is completed (fun fact – the average Ironman finish time is 12:35:00 – significantly longer than 2 hours, which is approximately how fast you’ll burn through your carbs at 1000 kcals per hour). You likely have two questions for me now:

1. Can’t I just replace the carbs I’m burning? Isn’t that what gels are for?

Yes, thank goodness. The challenge is that, on average, women can only absorb 100-200 kcals of carbs an hour, and men can only absorb 200-300 kcals an hour, at moderate intensity (yes – the faster you go, the more carbs you burn, and the harder it is to absorb carbs that you are consuming!) So if you’re burning 1000 kcals of carbs an hour, and can only replace 200 kcals – you do the math, but you’re still not making it to 12 hours and 35 minutes before you bonk.

2. If I burn through all my carb stores, won’t my body just slow me down and start using fat stores instead?

Unfortunately it isn’t that simple – aerobic metabolism requires some carbohydrates, even at very low activity levels, so if the carb tank is empty, you’re probably not going anywhere, slow or otherwise.

3. But the pros are going super-fast – aren’t they burning through 1000’s of carbs on the bike?

Yes, the pros are going super-fast – but we have to remember that our super-fast is their moderate. It isn’t that their bodies just have more carbs to burn, they just maintain higher power/speed at lower heart rates.

Many athletes take the trial and error approach – while doing progressively longer workouts, they test different nutrition strategies and track successes and failures, hopefully narrowing it down to something that works. Of course, that means if you don’t have many successful experiments before race day, you may or may not have a solid plan going into your event. There’s definitely a “hope for the best” element to this strategy that isn’t my preference, but has certainly worked for plenty of athletes, so I won’t knock it.

calorie test.jpg

However, at Playtri we utilize a form of performance testing that takes a good deal of the guesswork out of nutrition strategy for Ironman, which we call “Caloric Expenditure Testing,” or “Metabolic Testing.”

 I just about require all of my 70.3 and IM clients to complete this 15-20 minute test, which gives me a data chart that looks something like this:

Athlete Name: Edna Example

Test Date: May, 2017

Test: Bike

1st image.png

Let’s say this chart was completed for the athlete on the bike. If the athlete wanted to do her IM bike in 6 hours, and could average 19 mph on the bike on race day at 130 bpm, she could take 100 kcals of carbs an hour and come off the with carb stores essentially intact. So let’s say she isn’t quite that strong, and her heart rate will be at 145 for her to maintain that pace – taking 100 kcals of carbs an hour would now mean that she burned through 900 kcals of carbs prior to starting the run. Well, if she had 2000 kcals in the tank to start, that means she may have 1100 left for her run (not counting kcals burned during the swim), which, if she has the same chart for her run calorie expenditure, it could then be determined if that was enough to achieve her goal for the day.

For many athletes, doing the test and understanding how much they burn at different heart rates is enough – they or their coach can take the information, and formulate effective plans for training and racing.

However, what if the chart looked like this:

Athlete Name: Edna Example

Test Date: May, 2017

Test: Bike

2nd image.png

Even if the athlete can hold 19 mph at 130 bpm, and absorb 100 kcals of carbs an hour, she would still burn through 1800 kcals of carbs during the bike, leaving her with next to nothing to run her marathon on. Assuming she has done this test some months prior to her race, she has three options:

1. Change her goal (go slower than 6 hours on the bike)

2. Improve her ability to utilize fat instead of carbs at 130 bpm

3. Improve her power/speed at a lower HR

If she is doing the test a week before her race, she has one option:

1. Change her goal

This is why we recommend doing this test twice during long course training – once at the beginning of training to assess the situation, and help the athlete or coach effectively plan their focus for the coming training block (instead of just hoping for decent numbers prior to race day), and then once right before the race, to re-check numbers going into the event, and finalize the nutrition strategy.

Hopefully, this gets your gear spinning on long course nutrition. Of course, it isn’t just a numbers game. Other considerations, like what type of nutrition to take in, how to time it with hydration, what you personally are able to absorb, etc., are also part of the planning process. The most important thing is to start planning nutrition NOW, and make sure you have as much data as possible to do it efficiently. If you have questions, feel free to reach out to me, or any of the other Playtri coaches.

Learn more about Performance Testing at: playtri.com/testing/


recap.png


Bike Handling for Better Racing

Bike Handling for Better Racing

Want to get a leg up on the competition at your next non-drafting triathlon? Looking to get started in draft legal racing? Developing solid bike handling skills will give you a decisive advantage over your competition and make you a more confident, safer, and faster triathlete. 

Playtri has been working with triathletes and cyclists of all ages and experience levels for over 20+ years to be safer, faster, and more confident bike handlers. Our coaches regularly provide one-on-one bike handling sessions with athletes in the DFW area. Below are my favorite bike handling drills that can have an impact on race day.

Hold the Line: While in your aerobars, ride on the white line close to the shoulder. See how far you can ride without touching bare road. Try this at different speeds. As you gain confidence, try it one handed while you move your free hand to your water bottle, back of your jersey, back of your seat, helmet, etc. Make sure to practice with both hands.

Bottle Grabs: This is very race specific. Practice grabbing a water bottle from someone standing on the side of the road. Then practice filling your front hydration and/or placing the bottle in one of your bottle cages.

180 turns: In an empty parking lot, set up a cone to practice doing 180 turn going left and right. As you approach the turn, gear down into an easier gear. Apply the brakes as you come into the turn. Put your inside knee up, while pushing down on your outside foot, and use body lean to carry you around the turn. As you come out of the turn, spin your legs to get back up to speed. Practice this on your own and with friends.

Braking and Corners: In an empty parking lot, set up a set of cones that require you to make 4 left or 4 right turns. To keep from sliding out in the turn, place more of your weight on your front wheel by putting your hands on the bull horns of your tri bike or in the drops on your road bike. Don’t pedal while you corner. Instead put your inside foot up and outside foot down, lean the bike toward the direction you are turning, keep pressure on the outside foot. Release the brakes before you start the turn and lean your bike, not your body, into the turn. As you gain confidence, lean further into the corner. Remember to look where you want to go and not where you are or at the corner. Practice this on your own and with friends.

Drills like these not only help you gain more confidence but also make you a faster and safer cyclist. And if you are looking for specific guidance for ways you can improve as a cyclist, you can book a one-on-one session with one of our coaches here: https://playtri-dfw-scheduling.as.me/private-lessons

If you have questions about anything in this article or are interested in learning about different coaching options, please reach out to me at jim.rowe@playtri.com. Happy training and racing this year!

Jim Rowe is a Playtri Level 4 Coach and Coach Education Lead, a USAT LI Certified Coach, and NASM Certified Personal Trainer who works with adult athletes of all abilities from beginners to IRONMAN World Championship qualifiers. Learn more about Jim at www.playtri.com/jim-rowe.